
Last updated November 17, 2026
Crawl Space Encapsulation & Vapor Barrier Maintenance Schedule: What to Do and When
Boulder City soil is mostly caliche and sandy loam, and it moves. Summer heat cycles push it up and pull it back down enough that a vapor barrier’s perimeter connection can pull loose within 18 to 24 months of installation. You won’t see it from the yard. You won’t smell it in the living room. It just quietly stops doing its job while the crawl space underneath your floor starts taking on moisture again. This guide lays out a maintenance schedule built around that failure timeline: what to check at 12, 24, and 60 months, how to keep a humidity log that catches problems early, and which tasks you can do yourself versus which ones need a contractor.
Quick Answer
A crawl space vapor barrier in Boulder City should be inspected visually every 12 months, have its perimeter connection checked and re-taped at 24 months, and be scheduled for a full re-tensioning or partial reinstall around 60 months. Between those checkpoints, log one hygrometer reading per season from the same spot and time of day, and inspect for lifted or shifted sections after every monsoon season. Early perimeter failures cost under $200 to fix; a full reinstall at the five-year mark costs many times that.
Table of Contents
- Why the Schedule Follows the Soil, Not the Calendar
- The 12-, 24-, and 60-Month Inspection Points
- Building a Hygrometer Baseline Log
- What to Inspect After Each Monsoon Season
- The Documentation Record That Protects Your Warranty
- DIY Tasks vs. Contractor Tasks
- Materials and Mil Thickness: What Holds Up Here
- What Maintenance and Repair Actually Cost in Boulder City
Why the Schedule Follows the Soil, Not the Calendar
Most maintenance advice for crawl space encapsulation is written as if the barrier sits on a stable surface. In Boulder City, it doesn’t. The ground under a crawl space here is a mix of caliche – a cemented calcium carbonate layer that behaves more like soft rock than soil – and sandy loam that drains fast but shifts with moisture. Through a Boulder City summer, the top few inches of that ground can swing through wide temperature and moisture cycles week after week. The barrier itself doesn’t crack. What moves is the seam where the plastic meets the foundation wall, and the spots where it’s pinned at pier footings and penetrations.
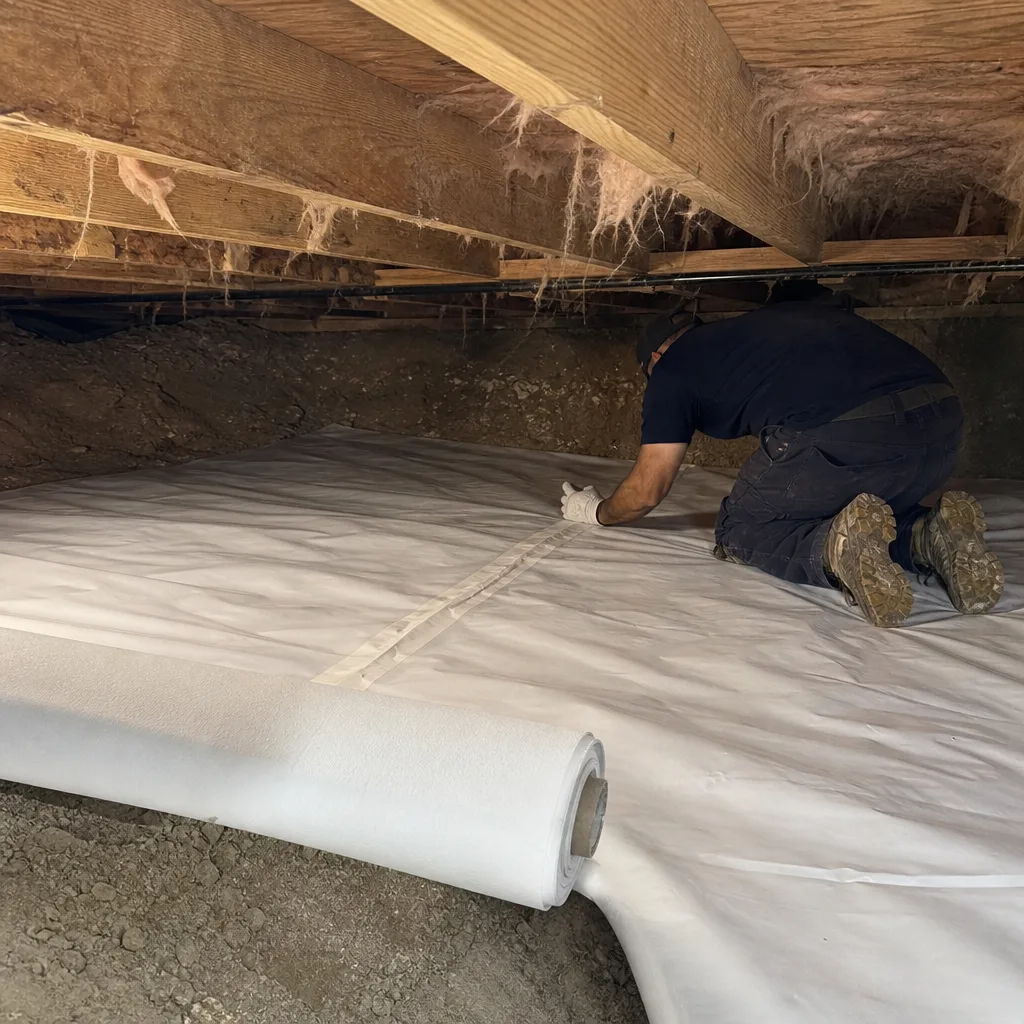
That perimeter connection is doing two jobs: keeping the vapor barrier sealed to the structure, and keeping the whole sheet tensioned across the crawl floor. When the soil under the edges shifts, the tape and adhesive at the wall connection take the strain first. Once that seam gives, the sheet slackens, water pools in the low spots, and the encapsulation you paid for starts behaving like an unsealed crawl space again. We’ve opened crawl spaces in Boulder City at the 20-month mark where a single run of seam tape had failed along 12 feet of wall, and the rest of the barrier was still perfect. That’s the pattern: one local failure, not a whole-system failure. Catching that one spot early is the entire point of a soil-driven schedule.
The 12-, 24-, and 60-Month Inspection Points
Three checkpoints matter most. Each one looks for something different, because the failure mode changes with time. Here’s what to inspect and what intact versus failing actually looks like.
12-Month Inspection
This is the early-warning check. You’re looking for the first signs of perimeter strain before the seam actually opens.
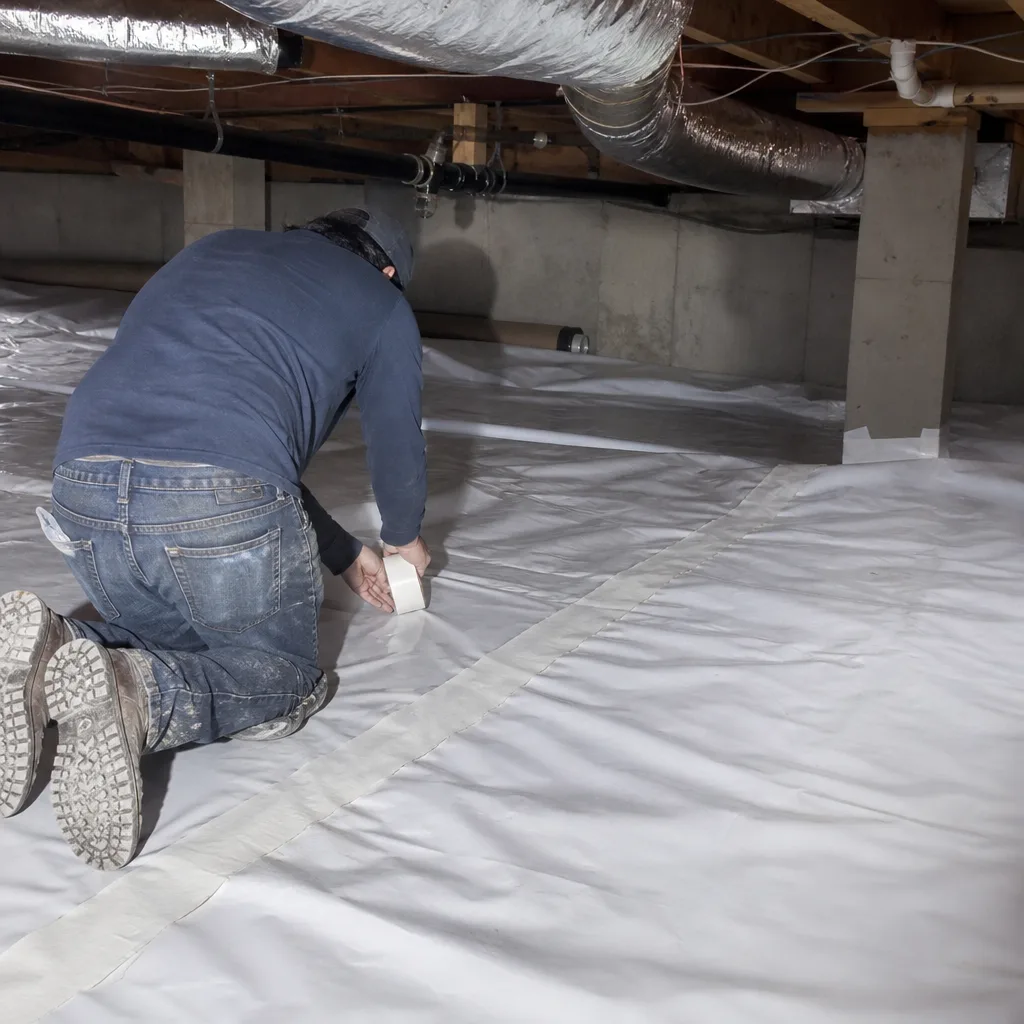
- Wall connection seam: Intact looks like a continuous, flat band of tape or adhesive with no lifting at the edges. Failing looks like curling tape corners, a visible gap between plastic and foundation wall, or small triangular pockets of slack forming at the seam.
- Penetrations: Pipes, piers, and posts should have a snug collar of barrier material with no gaps. Look for the plastic pulling away from any of these.
- Floor coverage: The barrier should lie flat against the crawl floor. Any billowing, bubbling, or slack indicates tension loss.
- Standing water: None should be visible. Puddles on top of the barrier mean either a seam failure or a drainage issue.
24-Month Inspection
This is where the caliche and sandy loam movement usually shows up. The 24-month check is the same visual inspection as the 12-month, plus a physical check: press gently along the perimeter seam in several spots. If the tape releases or the plastic moves freely under light pressure, the connection has failed and needs re-taping. This is the under-$200 fix. Skip it, and the slack spreads.
60-Month Inspection
By five years, even a barrier that’s been maintained will usually need re-tensioning or partial replacement. The material itself may still be sound, but the accumulated soil movement at the perimeter means the sheet needs to be re-pulled and re-secured. This is also when you’d evaluate whether the original mil thickness is holding up to the traffic and conditions, and whether any sections should be replaced rather than re-taped. Use this checkpoint as a planning moment, not a crisis.
If you want a deeper walkthrough of how the encapsulation itself is built, our Crawl Space Encapsulation & Vapor Barrier in Boulder City page covers installation from the ground up.
Building a Hygrometer Baseline Log
A hygrometer is a cheap instrument that reads relative humidity. The point of keeping a log isn’t to collect data for its own sake – it’s to build a baseline that makes a failing barrier detectable before you see water or damage. If you know what your crawl space normally reads in July, an unusual spike in September tells you something changed.
Here’s the method:
- Pick one fixed location. Choose a spot near the center of the crawl space, away from vents and foundation walls. Mark it. Use the same spot every time.
- Pick one time of day. Same time, every reading. Mid-afternoon works well because it captures the day’s peak.
- Take one reading per season. Four readings a year, roughly 90 days apart. Write down the date, the reading, and the outdoor conditions that week (dry, rained recently, monsoon).
- Note the indoor reading too. A $15 indoor hygrometer near the floor above the crawl space gives you a second data point. If the crawl space humidity rises while the house stays stable, that’s a barrier signal.
- Compare year over year. A single reading means nothing. The same reading in the same season a year apart means everything. A rise of more than 10 percentage points in a matched season is your cue to get the perimeter seam checked.
We’ve found that homeowners in Boulder City who keep a log catch perimeter failures about a full season earlier than those who rely on visual inspections alone. The log is the difference between a $180 seam fix and a $1,400 partial reinstall.
What to Inspect After Each Monsoon Season
Boulder City gets monsoon moisture in the summer months, and it arrives fast. When rain drives against the foundation vents, water can enter the crawl space faster than the barrier’s drainage design expects. The failure you’re looking for after a monsoon isn’t gradual – it’s a barrier section that got lifted by water pressure or shifted laterally off its seam.
After each monsoon event, do this check:
- Look at every foundation vent. Note whether water tracks are visible on the inside face of the foundation wall near the vent.
- Walk the full perimeter seam with a flashlight. Check for lifted tape, gaps at the wall connection, and any section where the plastic has pulled away from the wall by more than a finger’s width.
- Check for lateral shift. Look at the barrier’s position relative to pier footings and penetrations. If the collar around a pipe or post has moved off-center, the sheet has shifted.
- Look at the low spots. If water has pooled anywhere and not drained, the tension is gone and the section needs re-securing.
- Take an extra hygrometer reading. Compare it to your baseline. A spike right after monsoon tells you the barrier took on water even if you can’t see where.
If you find a lifted or shifted section, don’t pull it back and hope. The seam needs re-adhered and the tension corrected, and that’s a contractor task. Our Envelope Insulation Boulder City home page has more on how we approach crawl space and envelope work.
The Documentation Record That Protects Your Warranty
When a barrier fails and you need warranty coverage, the documentation is what decides whether the claim gets honored. Not the photos you took on your phone – the record the installer should have left with you on day one. Here’s what that record needs to contain and why each piece matters.
- Installation date. Warranty periods run from a specific date. Without it, you’re arguing about when the clock started.
- Material specification and mil thickness. A 10-mil barrier and a 20-mil barrier have different expected service lives. Warranty terms are usually written against a specific material spec, so the record has to show what was installed.
- Installer name and company. The warranty is issued by a specific contractor. If you can’t name who installed it, you can’t make a claim against them.
- The initial post-install humidity reading. This is the baseline. A warranty claim for moisture damage has to show the crawl space was dry at handoff. That first reading is the proof.
Store the record somewhere you’ll find it in five years – a digital copy in your email or cloud drive, plus a paper copy with your home’s other maintenance documents. The physical record should be a written scope, a written warranty, and a Documented Photo Record of the installation. Under Haven Standard: Have it in writing, that documentation is delivered before anyone starts work. If you’re ever handed a verbal promise instead of a written one, ask for it in writing before the crew begins.
DIY Tasks vs. Contractor Tasks
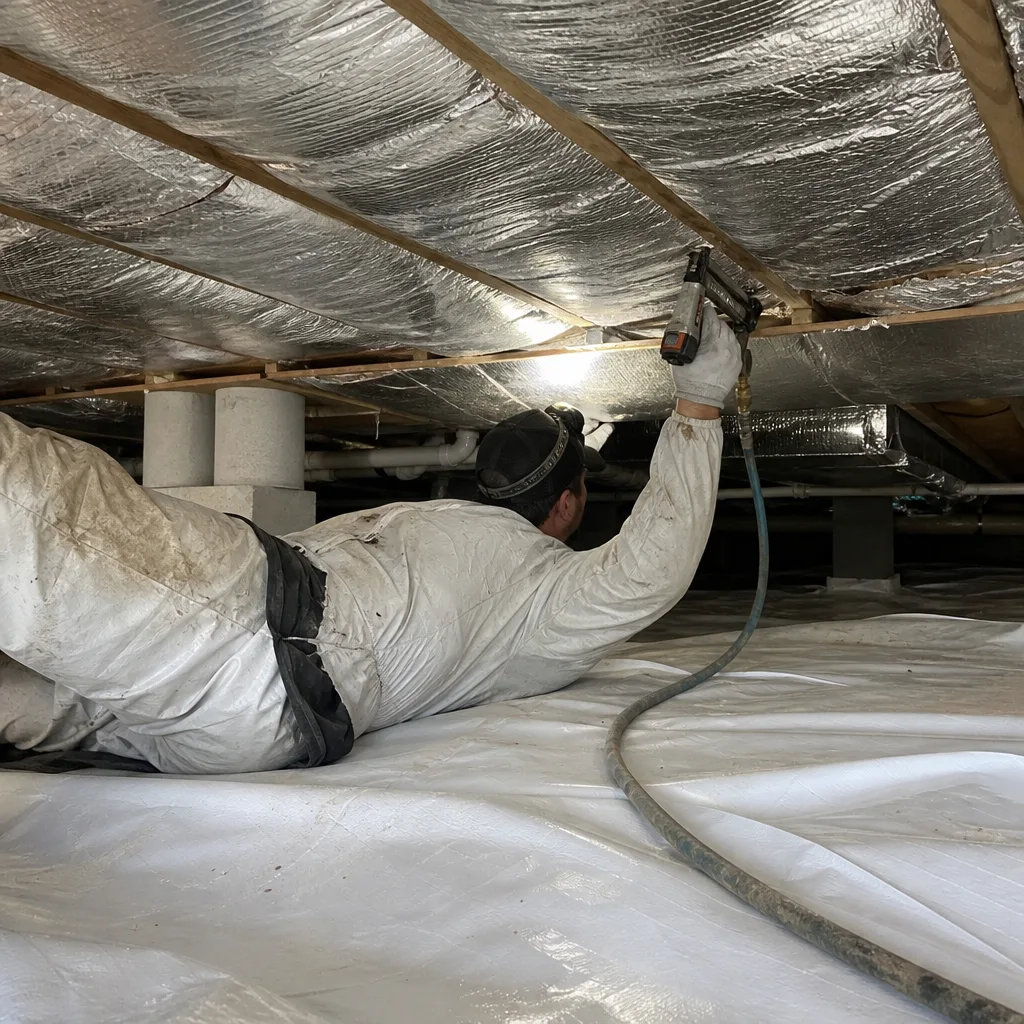
Some maintenance you can handle yourself. Some you shouldn’t. The line falls at anything that requires re-adhering the barrier to the structure or working in a tight, potentially contaminated crawl space.
Tasks you can do yourself
- Hygrometer readings. One per season, same spot, same time. This is the single most valuable maintenance task, and it takes five minutes.
- Visual perimeter check with a flashlight. A slow walk along the inside face of the foundation wall, looking for lifted tape and gaps. Wear a respirator and gloves, and don’t crawl on the barrier if the crawl space has standing water.
- Post-monsoon vent inspection from outside. Check the foundation vents from the exterior for debris or damage.
- Keeping the log and the documentation record current.
Tasks that require a contractor
- Seam re-taping at the wall connection. This requires the right adhesive and a clean, dry surface, plus getting the tension right so the seam holds against the next soil cycle. Done wrong, it fails in months.
- Penetration resealing. Collars around pipes and posts need proper material and a tight fit. A homeowner-grade patch will lift.
- Re-tensioning the sheet. Pulling a slack barrier back into position is a two-person job with specific technique.
- Any inspection where you find standing water or visible mold. That’s beyond maintenance – it’s a diagnosis.
If you’re not sure which side of the line a task falls on, that’s a call. For crawl space work specifically, our Attic Insulation in Boulder City team can also check the attic side of the envelope, since crawl space and attic moisture problems often interact.
Materials and Mil Thickness: What Holds Up Here
Boulder City’s soil movement and monsoon cycle put more strain on barrier materials than a milder climate would. In practice, that means the mil thickness and seam tape quality matter more here than they would in a stable-soil region.
A 6-mil barrier is thin for a crawl space in this area. It punctures more easily, flexes less well under soil movement, and its seams fail faster. A 10-mil or 12-mil reinforced barrier is the practical floor for Boulder City, and many installations here use 20-mil because the added rigidity helps the perimeter connection survive the first soil cycle. The reinforcing scrim (the woven grid inside the plastic) is what resists tearing at piers and penetrations; a smooth, unreinforced sheet will tear at those points within a few years.
Seam tape is the other half of the equation. A butyl or rubberized seam tape holds far better against soil movement than a basic construction adhesive. When we specify materials, we source from established manufacturers – Owens Corning, Johns Manville, Knauf, Rockwool, CertainTeed, Icynene, Demilec, and GreenFiber – and there’s no proprietary lock-in. If you already have a barrier in place, the material spec in your documentation record tells you what you’re working with and whether it’s worth re-taping or replacing.
For a comparison of different insulation materials and how they interact with crawl space conditions, see our Spray Foam Insulation in Boulder City page.
What Maintenance and Repair Actually Cost in Boulder City
Here’s the price range on the page, because you shouldn’t have to call to find out what a seam fix runs. Boulder City crawl space maintenance costs break down roughly like this:
- Perimeter seam re-taping (one wall run): $150 to $250.
- Penetration resealing (per penetration): $40 to $90.
- Full re-tensioning of an existing barrier: $350 to $650, depending on crawl space size and access.
- Partial barrier replacement (one failed section): $600 to $1,200.
- Full crawl space reinstall at the five-year mark: $1,400 to $3,200 or more, depending on square footage and material spec.
- Annual inspection with a written report and photo record: $125 to $225.
The math is the argument for the schedule. A $180 seam fix at 24 months versus a $1,400 to $3,200 reinstall at 60 months is the whole reason this guide exists. Under Haven Standard, you get a written price before any work starts, and a free second opinion on any written estimate you bring us.
If you’re still deciding whether encapsulation is the right move in the first place, the crawl space encapsulation page walks through the installation decision.
Common Mistakes to Avoid
- Waiting for visible water before inspecting. By the time you see standing water on the barrier, the seam has been failing for months. The 12-month visual check is designed to catch it earlier.
- Skipping the post-monsoon check. Boulder City monsoons are the single biggest event for barrier shifting. One missed season is often the one that lifts a section.
- Re-taping a wet or dirty seam. Tape won’t adhere to a damp or dusty surface. If the seam is wet, it needs to dry and the tension needs re-checking before any re-taping.
- Throwing away the installation documentation. Without the installation date, material spec, installer name, and initial humidity reading, a warranty claim is nearly impossible to win.
- Taking hygrometer readings from different spots. A reading from the center and a reading from near a vent aren’t comparable. Same spot, same time, every time.
- Assuming a 6-mil barrier will last five years here. In Boulder City’s soil, thin barriers fail faster than the material rating suggests. If you have a 6-mil barrier, inspect it more often.
- Pulling a slack section back by hand and calling it fixed. Slack means the perimeter tension is gone. Without re-securing the seam, the section will slack again within a season.
When to Call a Professional
Call a contractor if you find a lifted or gaping perimeter seam, a barrier section that has shifted off a penetration, standing water on top of the barrier, or visible mold in the crawl space. Call if your post-monsoon check shows the barrier has moved, or if your hygrometer log shows a rise of more than 10 points in a matched season. Call if your documentation record is missing and you’re trying to make a warranty claim. And call if you’re not sure whether what you’re seeing is a failure – a $125 inspection is cheaper than a $1,400 reinstall. Envelope Insulation Boulder City offers free estimates in Boulder City – call (844) 320-7926. Under Haven Standard: Arrive on schedule, you get a named technician and a text when they’re on the way, plus a Documented Photo Record and a written price before any work starts.
Frequently Asked Questions
Visually inspect every 12 months, check and re-tape the perimeter connection at 24 months, and plan for re-tensioning or partial replacement around 60 months. The soil movement in Boulder City – caliche and sandy loam – makes perimeter seam failure likely within 18 to 24 months, so the schedule is built around that. Call (844) 320-7926 for an inspection quote.
A perimeter seam re-taping runs $150 to $250 for one wall run, penetration resealing is $40 to $90 per penetration, and full re-tensioning is $350 to $650. A partial replacement is $600 to $1,200, and a full reinstall at the five-year mark is $1,400 to $3,200 or more. Call (844) 320-7926 for an exact quote – estimates are free.
You can, but the results usually don’t last. Getting the tape to hold requires a clean, dry surface and the right tension at the perimeter connection; a homeowner patch on a slack section tends to fail within months. Call us for a quote and we’ll tell you whether it’s a $180 fix or something bigger.
Keep the crawl space below 60% relative humidity year-round, and ideally in the 45% to 55% range. Boulder City’s dry summers help, but monsoon moisture can push readings up quickly. A log showing readings above 65% for more than a few days after a monsoon is a signal to get the barrier checked. Call (844) 320-7926 to schedule an inspection.
The installation date, material specification and mil thickness, installer name and company, and the initial post-install humidity reading. Without all four, a warranty claim is hard to make. Store a digital copy and a paper copy, and ask your installer for a written scope, written warranty, and Documented Photo Record on day one.
Yes. Monsoon rain driven against foundation vents can lift or laterally shift a barrier section in a single season. After every monsoon, check the perimeter seam with a flashlight and take an extra hygrometer reading. If you find movement, call (844) 320-7926 – estimates are free.
The Bottom Line
Boulder City vapor barriers fail on the soil’s timeline, not the calendar’s. The schedule that works is a 12-month visual inspection, a 24-month perimeter seam check and re-tape, and a 60-month re-tensioning or partial replacement, with a hygrometer log running underneath the whole thing. The early fix runs under $200; the late fix runs into the thousands. Keep your documentation record, inspect after every monsoon, and know where the line sits between what you can do yourself and what needs a contractor. Under Haven Standard, you get a written price before any work starts, a Documented Photo Record on every visit, and the 365-Day Done Right Promise – if it’s not done right, we make it right.
Call (844) 320-7926 for a free estimate in Boulder City. We’ll inspect the barrier, read the seams, and hand you a written price before anything starts.
Written by the team at Envelope Insulation Boulder City.