
Last updated November 17, 2026
Crawl Space Encapsulation & Vapor Barrier Troubleshooting: Common Problems and How to Fix Them
A vapor barrier that covers 95% of a crawl space floor performs almost identically to no barrier at all when the perimeter wall connection is unsealed. Moisture migrates laterally beneath the plastic, reaches the exposed edge, and evaporates into the crawl space exactly as it would have without the barrier. We’ve pulled failed encapsulation systems in Boulder City where the floor plastic was pristine and the whole job still wasn’t working, because the failure lived at the wall. This guide walks you through finding the failure yourself, with a flashlight and about 20 minutes, before you spend money on a service call.
Quick Answer
Most crawl space encapsulation failures happen at one of three locations: the perimeter wall connection, the seams between sheets, or the penetrations around pipes and columns. On a dry day, get into the crawl space with a flashlight and a notebook, inspect those three areas in that order, and you can identify which failure type you have before you call anyone. Most of what you find is diagnosable from the floor.
Table of Contents
- The Three Failure Locations, In Order of Frequency
- Failure One: Perimeter Wall Detachment
- Failure Two: Seam Separation
- Failure Three: Penetration Gaps
- Using a Hygrometer to Find the Leak Without Moving the Barrier
- Reading Condensation Direction: Under the Barrier vs. On Top
- The Repair Decision Tree: Tape, Replace, or Redo
- What to Photograph and Measure Before You Call
The Three Failure Locations, In Order of Frequency
Encapsulation systems fail by degree, not usually by total collapse. The plastic stays down, the crawl space still looks encapsulated from the access hatch, and the humidity readings stay too high. That’s the frustrating part. The homeowner isn’t seeing a visible disaster; they’re seeing a system that isn’t doing what they paid for. In practice, the failure lives at one of three points, and the order of frequency is consistent.
First is perimeter wall detachment. Second is seam separation. Third is penetration gaps around plumbing, electrical conduit, columns, and support posts. If you’ve had encapsulation put in and it isn’t holding, statistically you’re looking at the perimeter connection. That’s especially true in Boulder City, where the desert soil moves seasonally, roof runoff concentrates at the stem wall, and a barrier that was tucked clean behind a mechanical fastener in January can be pulled loose by the following summer.
What the three failures share: each allows moist crawl space air to reach conditioned air in the house above, or ground moisture to bypass the barrier entirely. What they don’t share is the fix. A torn seam is often a tape repair. A detached perimeter usually needs the wall attachment redone along whatever run of the perimeter has failed. A penetration gap is often a mechanical fastener and a patch. Diagnosis first, then scope, then price.
Failure One: Perimeter Wall Detachment
Go to the crawl space and shine a light along the top edge of the plastic where it meets the foundation stem wall. What you want to see is a continuous, mechanically fastened, sealed attachment. What you’re looking for as a failure signal is any gap, any visible curling of the plastic away from the wall, or any run where the plastic has pulled down below the attachment point and left bare block or concrete exposed.
In Boulder City, perimeter detachment runs in a predictable pattern. The worst areas are on walls that take direct afternoon sun, because thermal cycling on the exterior wall face pulls at the same fastener line day after day. The second worst are walls closest to any exterior grade that slopes toward the house, since the water table in the soil is highest there after a rain.
Signs of perimeter detachment:
- Plastic curled or rolled back from the wall, even a half inch
- Bare foundation wall visible above the top edge of the plastic
- Water staining on the interior face of the stem wall at floor level
- Ground visible under the plastic edge where it should tuck into the attachment
- Whiskers of efflorescence (the white powdery mineral deposit on concrete) along the bottom of the stem wall
A detached perimeter is not a tape fix. The plastic needs to be reattached to the wall mechanically, with a proper termination bar or fastener set, then sealed. If a barrier has been terminated at the wall with adhesive alone, or tucked without fastening, plan on that run being redone.
Failure Two: Seam Separation
Seam separation is the second most common failure, and it’s the one most likely to be a homeowner-fixable problem. Where two sheets overlap, they should be sealed with a compatible tape that stays stuck. When the tape lifts, air and moisture migrate through the gap along the entire seam line, and the barrier becomes decorative.
What you’ll see: lifted tape edges that curl up when you press them, dust or grit under the tape where it’s failed, visible V-shaped openings between sheets that catch your flashlight beam, and in advanced cases a tape line that looks intact until you push on it and it releases. On a failed seam, the tape has typically lost grip because the plastic was dusty or wet when it was applied. In a Boulder City crawl space during the summer, ambient conditions during installation matter.
Working through seams in order:
- Start at the far end of the crawl space and work backward toward the access hatch so you don’t retrace your steps.
- Press along every tape line with your thumb; any spot that lifts is a failure point.
- Mark each failed segment with a scrap of tape in a contrasting color so you can come back with material.
- Note the length of each failed segment, not just the location. A 4-inch lifted edge and a 3-foot open seam are the same “problem” until someone scopes the repair.
- Photograph each mark with something in the frame for scale (a tape measure, a boot, a pencil).
Approved seam tape (a butyl or acrylic vapor-barrier tape rated for crawl space use) on a clean, dry surface is often sufficient for a lift of an inch or two. A seam that has fully opened, or has failed because the two sheets barely overlapped in the first place, needs a new sheet cut to fit and sealed.
Failure Three: Penetration Gaps
Penetrations are where plumbing, electrical conduit, HVAC line sets, columns, and support posts pass through the floor or the barrier. Every one of them is a place where the plastic has to be sealed to the penetrating material, and every one is a leak location if that connection isn’t tight. This is the third most common failure but the most often missed, because penetrations are harder to see and there are more of them than homeowners expect.
What to check:
- Around every pipe: is the plastic wrapped tight and sealed, or is there a visible gap?
- Around every support column: has the plastic been brought up and sealed to the base of the column, or is it just laid over the footer?
- Around electrical conduit: is the conduit under plastic or is the plastic cut to sit beside it, leaving open ground exposed?
- At the bath trap and any below-floor plumbing: is there a sealed boot, or a hole cut in the barrier without a connection?
- At the sump pit lid, dehumidifier drain, or radon stack if present: sealed or vented into the crawl space?
Penetration gaps are often a same-visit fix. The barrier is intact, the penetration is accessible, and the connection can be re-sealed with approved tape and a mechanical support if needed. Penetrations that have been used as access points and not re-sealed after a service call (HVAC, plumbing, pest control) are the most common reason a previously working barrier stops working. If you’ve had any trade under the house recently, check the penetrations first.
Using a Hygrometer to Find the Leak Without Moving the Barrier
A hygrometer (a meter that reads relative humidity) can tell you which of the three failure locations is dominating, before you touch the plastic. The idea is simple: measure the moisture at points that are fed by different failure types and see which is highest.
Before you start, pick a dry day, ideally mid-morning after overnight air has settled. Take readings (a basic battery hygrometer is enough) and record the number, the location, and the time.
- Read humidity at the dead center of the crawl space, 2-3 feet off the floor. This is your baseline.
- Read humidity within 12 inches of the perimeter wall, at the same height. If perimeter is failing, this reading runs meaningfully higher than center.
- Read humidity over the middle of a seam, 2-3 feet above it. Seam failure shows up here before it shows up at center.
- Read humidity directly over the highest-priority penetration (the plumbing stack is usually the biggest). A penetration leak gives a spike right at the penetration, falling off within a couple of feet.
- Compare and record. The point with the highest reading above baseline tells you which failure type to look at first.
What you’re looking for is directionality. If the perimeter reading is 10-15% relative humidity higher than center, perimeter detachment is the likely driver. If center and perimeter match and a penetration area reads higher, the penetrations are the problem. If everything reads high, or if the entire crawl space sits at the same damp level across seasons, you may be looking at a barrier that never attached correctly in the first place. That last diagnosis is worth knowing before you schedule anyone.
Reading Condensation Direction: Under the Barrier vs. On Top
Direction of condensation is a diagnostic that gets skimmed past in most guides. It’s actually one of the fastest ways to separate two very different problems: ground moisture coming up, versus air infiltration coming in.
If condensation forms on the underside of the vapor barrier (the side facing the dirt), you’re seeing ground moisture that got trapped below the plastic. Warm soil vapor rises, hits the cooler plastic, and condenses. That’s a barrier doing part of its job (blocking vapor from below) but with excess ground moisture accumulating under it. Causes are usually ground that wasn’t graded before the barrier was installed, a missing or undersized drainage path, or an intact barrier in a house where soil moisture is genuinely high.
If condensation forms on the top of the vapor barrier (the side facing the crawl space air), you’re seeing moisture in the crawl space air itself condensing on a cool surface. That’s a signal of air infiltration from outside or from the house above, carrying humidity that later condenses. The failure is not the barrier; it’s the building envelope letting air move where it shouldn’t. That’s a different problem with a different fix, and often the fix involves air sealing and insulation above the barrier, not another layer of plastic below.
In Boulder City’s climate, this distinction matters. Our dry air makes top-side condensation less dramatic in the summer but just as real. Crawl space air that reads fine in June can turn damp in January when the outside temperature drops and any air leakage through the perimeter wall gets cold on the way in. If you’re seeing top-side condensation in winter, perimeter and seam failures are the likely route.
The Repair Decision Tree: Tape, Replace, or Redo
Once you know which failure you have, the decision tree is faster than most contractors will tell you. The goal is to scope the repair before you call, so the estimate matches what you actually need.
- Seam lift of an inch or less, on a clean dry surface: approved vapor-barrier tape repair. Often done in one visit, same-day if material is on hand. No replacement sheet needed.
- Open seam between two sheets, or a seam that has been taped twice and failed: new sheet cut and installed with a proper overlap, then taped. This is a two-sheet operation in most cases, not a tape fix.
- Penetration gap with intact barrier around it: re-seal to the penetrating material with approved tape plus mechanical support. One visit, one repair point, usually quick.
- Perimeter detachment along a single wall run: mechanical reattach along the failed run, re-seal, and inspect the adjacent run. If one wall has failed, check its corners.
- Perimeter detachment along multiple walls, plus visible abrasion, plus repeated tape failures: the original installation attachment method failed. Plan on a perimeter redo, not spot repairs.
- Category 2 or 3 water damage (mold, standing water, badly degraded plastic): full re-encapsulation. Spot repairs on a barrier that has already harbored mold don’t solve the problem.
The one thing we’d flag strongly: hesitation on the perimeter redo is what costs homeowners the most. We’ve seen three rounds of spot repairs at $250-$500 apiece over two years on a barrier that needed a $1,400 perimeter redo the whole time. If your repeats are happening at the perimeter, the redo is the cheaper path, not the expensive one.
What to Photograph and Measure Before You Call
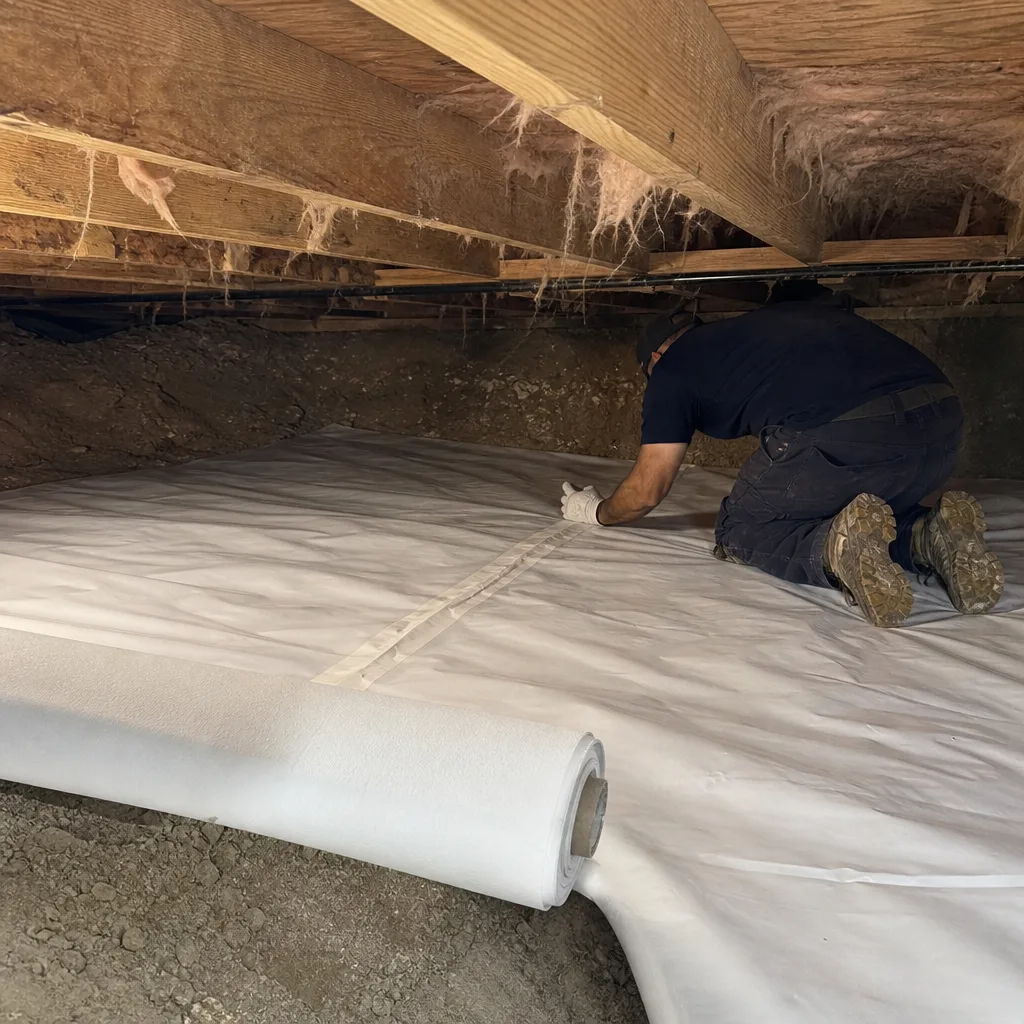
The single biggest thing you can do to keep the service call short and the estimate honest is document what you found before you call. A contractor who can scope a repair from photos and measurements doesn’t need to build a site-visit fee into the estimate.
Take these photos:
- Wide shot of the whole crawl space from the access hatch (orientation)
- Close-up of each marked failure point with a tape measure or other scale object in frame
- Perimeter run where the plastic attaches to the wall, end to end, if you can
- Top of the stem wall (interior face) where any moisture staining appears
- Every penetration, wide and close
- Underside and topside of the barrier at each point where you saw condensation
Record these measurements:
- Length of each failed seam (in inches or feet)
- Length of perimeter run that has detached (in feet)
- Number of penetration gaps
- Hygrometer readings at center, perimeter, seam, and penetration, with the time
- Ambient temperature in the crawl space at time of inspection
- Any evidence of standing water, mold, or pest activity
That package, written down and photographed, is what lets a reputable contractor give you a real scope instead of a “we’ll need to see it” placeholder. Most crawl space encapsulation problems in Boulder City can be quoted to within about $100 of the final number when this information is available.
Common Mistakes to Avoid
- Re-taping a failed seam without cleaning the surface first. Tape on dusty plastic fails again in a season. Wipe with a damp cloth and let it dry fully before applying new tape.
- Adding a second layer of plastic over a failed barrier. This traps moisture between the layers and hides the actual failure. Diagnose, then repair.
- Assuming condensation means the barrier is bad. Top-side condensation means air infiltration, which the barrier didn’t cause and can’t fix alone.
- Spot-repairing the perimeter twice before considering a redo. If the same run has detached twice, the attachment was never right; don’t spend the third $300 on the same fix.
- Ignoring the crawl space because the house above feels dry. In Boulder City, winter air is so dry that crawl space moisture doesn’t always register as house-level humidity. A hygrometer reading tells you what the house feels like it doesn’t.
- Skipping documentation before calling a contractor. Verbal “it’s leaking near the wall” gets you a broad-range estimate. Photos and measurements get you a scoped price.
- Letting the same HVAC or plumbing visit leave penetrations open. Ask whoever enters the crawl space to re-seal what they open; a $0 seal saves a $200 repair.
When to Call a Professional
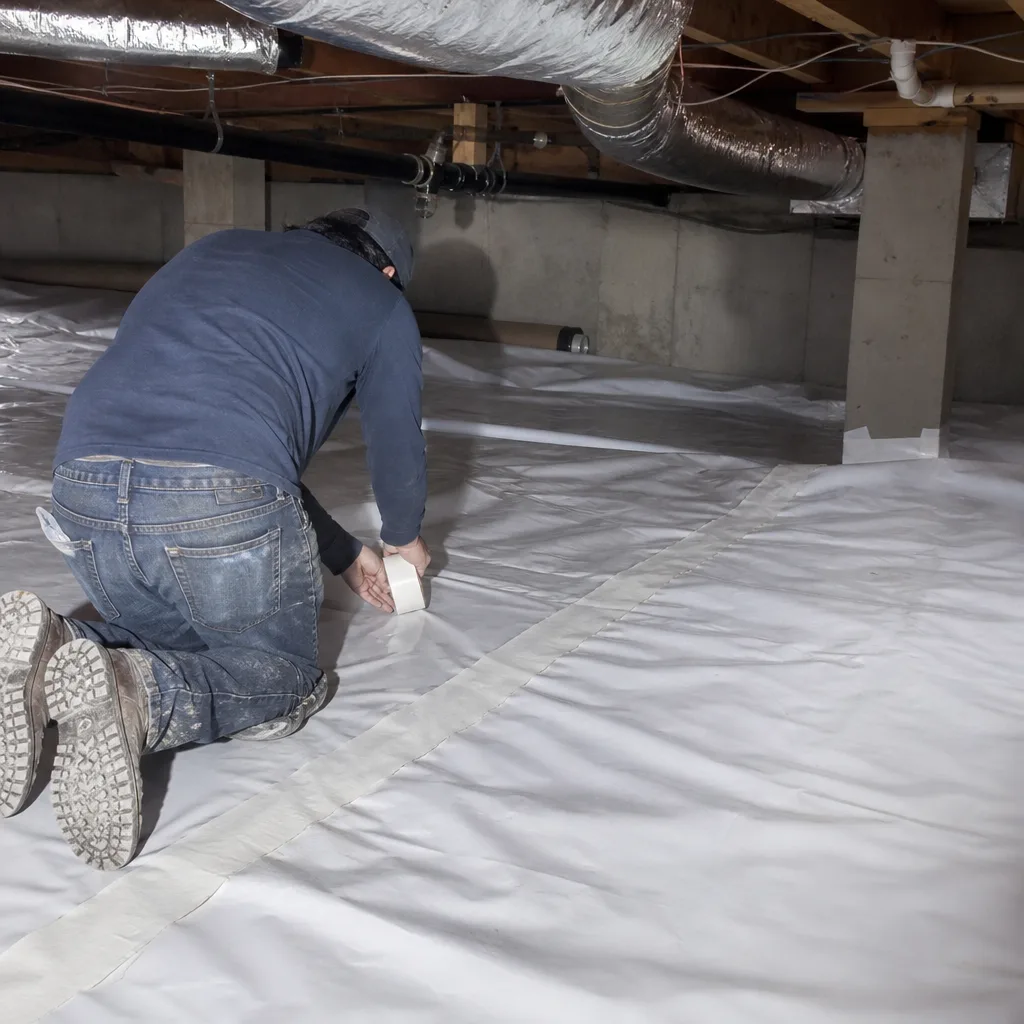
If your barrier has detached along a perimeter run of more than a few feet, if multiple seams have failed, or if any part of the barrier is showing mold, standing water, or pest activity, call. Those are beyond the home-diagnosis scope and need the barrier reattached with mechanical fastening and proper material, not tape in your hand. Also call if you’ve already done the diagnostic here and the readings don’t match a single failure location, because a mixed signal usually points to an installation problem rather than a repairable leak.
If your crawl space is showing signs of moisture that a vapor barrier alone can’t solve, the fix usually starts above the barrier. Our page on Crawl Space Encapsulation & Vapor Barrier in Boulder City walks through what a proper installation looks like, and our Envelope Insulation Boulder City home page shows how the envelope work fits together.
Envelope Insulation Boulder City offers free estimates in Boulder City. Every job begins with a written price and a written scope before any work starts, and calls are answered by a live person 24/7. Our technicians have up to 10 years of experience. Call (844) 320-7926 to schedule a diagnostic visit or to review photos you’ve already taken.
Frequently Asked Questions
The fastest check is a visual inspection of the perimeter wall connection, the seams, and the penetrations on a dry day. Add a hygrometer reading at center and near the perimeter wall, and if the perimeter reads meaningfully higher than center, you’re looking at a perimeter detachment. A persistent musty smell and elevated house-level humidity in winter are secondary signals.
Water on top of the vapor barrier means humid crawl space air is condensing on the barrier’s cool surface, and the source is air infiltration from outside or from the house above, not the barrier itself. Check the perimeter wall connection and penetrations first. Fixing the air path fixes the condensation; adding a second barrier does not.
Yes, for a seam lift of about an inch or less on a clean, dry surface. Use a vapor-barrier-rated tape (butyl or acrylic), wipe the surface first, and press firmly. If the seam has fully opened or has been re-taped twice and failed again, a new sheet with a proper overlap is the right fix.
Perimeter detachment shortly after installation almost always traces to the attachment method, not the material. If the plastic was tucked and adhesive-sealed without mechanical fastening, or fastened into a wall that wasn’t clean or dry at the time, it will lift as soon as the seasons cycle. That’s a warranty conversation with the original installer, and it’s worth having before you do anything else.
Seam and penetration repairs typically run a few hundred dollars per repair point. A perimeter reattach along a single wall run, or a partial re-encapsulation, usually lands higher. A full perimeter redo is more than spot repairs on the day but cheaper than three failed spot repairs over two years. Exact pricing depends on crawl space square footage, the number of failure locations, and whether the existing plastic is salvageable.
If the plastic is intact and the failures are isolated to seams and penetrations, repair is almost always cheaper and works. If the barrier has been spot-repaired twice and failed both times, or if it shows mold or a compromised perimeter across multiple walls, replacing it correctly is the cheaper option over a 3-5 year horizon.
For a full diagnostic and a written price before any work starts, call Envelope Insulation Boulder City at (844) 320-7926. If you’ve already had attic insulation work done above the crawl space, it’s also worth reading about Attic Insulation in Boulder City, since a dry crawl space and a properly sealed attic work together to control house humidity.
The Bottom Line
Failed crawl space encapsulation almost always fails at one of three places: the perimeter wall connection, the seams, or the penetrations. A flashlight, a hygrometer, and 20 minutes in the crawl space usually tell you which. Direction of condensation splits ground moisture from air infiltration, and a documented set of photos and measurements tells a contractor enough to quote the repair without a site visit markup. Do the diagnosis first, then decide. If you’re in Boulder City and want a second opinion on what you found, or a written price for the repair, call Envelope Insulation Boulder City at (844) 320-7926. Estimates are free, calls are answered by a live person 24/7, and every job ends with a written record you keep. For related envelope work, see our pages on Spray Foam Insulation in Boulder City and the full range of services on our Envelope Insulation Boulder City home page.
Written by the team at Envelope Insulation Boulder City.